3D printing is an intriguing technology that allows you to turn computer plans into tangible objects. If you’re new to 3D printing, you might be wondering where to begin. We’ll lead you through the entire process, from selecting a design to printing your object, so you can start producing your 3D masterpieces right away.
How to use a 3d printer in 5 simple steps.
- Choosing the best 3D Printer.
- Creation of model.
- Preparation of model for printing.
- 3D Printer setup.
- Post-Processing.
Choose the Right 3D Printer for Your Needs.
You must first choose the best 3D printer for your needs before you can begin printing your 3D drawings. There are numerous types of 3D printers available, each with its own set of benefits and drawbacks. Certain printers are better suited to producing little, intricate objects, whereas others are better suited to printing huge objects quickly. Consider variables such as pricing, print quality, and ease of use when purchasing a 3D printer.
you can read our complete guide on 3d printers for selecting the right Printer.
Do you need a 3D printer?
Yes, if you are an engineer, designer, or architect who needs to create prototypes, or a DIY enthusiast who likes to tinker and create unique objects, then a 3D printer could be an excellent investment.
What type of 3D printer is best for you?
There are several types of 3D printers available, including FDM, SLA, DLP, and SLS. Each has its advantages and disadvantages, and the one you choose will depend on your budget, the size of the objects you want to print, and the level of detail you require.
How much is a 3D printer for home use?
Many entry-level models costing around $200 and high-end models costing thousands of dollars. As a beginner, you can start with a low-cost printer and upgrade as you gain experience.
if you want to know how much power a 3d printer needs to operate then check our guide here.
Create or Download a 3D Model.
The first step in using a 3D printer is to create or download a 3D model. There are many software options available for creating 3D models, such as Tinkercad, SketchUp, and Blender. If you’re not comfortable creating your own model, there are also many websites where you can download pre-made models for free or for a fee. Once you have your model, you’ll need to save it in a format that your 3D printer can read, such as STL or OBJ.
Can you create your own 3D model?
To print an object using a 3D printer, you need a 3D model. You can either create your own 3D model using 3D modeling software or download one from online repositories. If you are a beginner, it’s best to start with simple models and gradually work your way up to more complex designs.
Which is the best software for 3D modeling?
There are many 3D modeling software options available, such as Tinkercad, SketchUp, Blender, Fusion 360, and SolidWorks. Choose one that is compatible with your 3D printer and that you feel comfortable using.
How can I download 3D models?
Several websites offer free and paid 3D models, including Thingiverse, MyMiniFactory, and Pinshape. You can also purchase 3D models from online marketplaces like TurboSquid and CGTrader.
What format do I need for 3D printing?
Most 3D printers accept STL files, which is a standard file format for 3D models. However, other file formats like OBJ and 3MF are also widely used.
Prepare Your Model for Printing.
Now that you have creat or download your 3D model, the next step is to prepare it for printing.
This involves using Slicing Software to break down the model into layers that the 3D printer can understand. Slicing software allows you to adjust settings such as layer height, infill density, and support structures. It’s important to choose the right settings for your model to ensure a successful print. Once you’ve sliced your model, you can save it to an SD card or transfer it to your 3D printer via USB.
What is slicing in 3D?
Slicing is the process of breaking a 3D model down into thin layers that can be printed one at a time. A slicing software is used to perform this task.
How to make 3D model slices?
To slice a 3D model, you need slicing software. Most 3D printers come with a slicer, or you can use free slicing software like Cura or PrusaSlicer.
Once you have the software, load your 3D model and adjust the settings, such as layer height, infill density, and print speed.
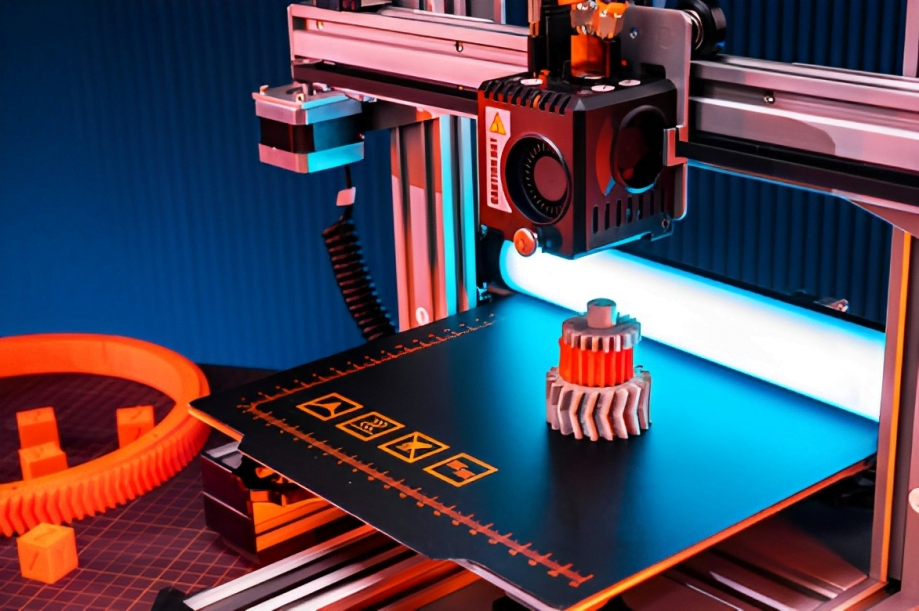
Set Up Your 3D Printer and Start Printing.
Once you have your sliced model ready, it’s time to set up your 3D printer and start printing. First, make sure your printer is properly calibrated and leveled. This is important to ensure that the printer can accurately print each layer of your model. Next, load your filament into the printer and heat it up to the appropriate temperature for your material. Finally, insert your SD card or connect your printer to your computer and start the print job. Be sure to monitor the print job to ensure it’s progressing smoothly and make any necessary adjustments along the way. With a little practice, you’ll be creating your own 3D objects in no time!
How do I prepare my 3D printer before printing?
Before you start printing, you need to prepare your printer. This involves leveling the bed, loading the filament, and making sure that the printer is calibrated. Most 3D printers come with detailed instructions on how to prepare the printer for printing.
Once the printer is prepared, load the sliced model onto an SD card or connect the printer to your computer using a USB cable. Then, insert the SD card or upload the model to the printer software and start the print.
Post-Processing and Finishing Your 3D Print.
Once your 3D print is complete, it’s time to remove it from the printer and do some post-processing and finishing. This may include removing any support structures that were printed along with your model, sanding down rough edges or surfaces, and applying a coat of paint or finish to give your print a polished look. Depending on the complexity of your model and the level of finishing you want to achieve, this step can take anywhere from a few minutes to several hours. But with a little patience and attention to detail, you can create a 3D print that looks and feels like a professional-grade object.
Does 3D printing require post-processing?
After printing, you may need to perform some post-processing to clean up the object and remove any imperfections. This may involve sanding, painting, or smoothing the surface. The amount of post-processing required will depend on the quality of the print and the type of object you printed.
Conclusion
Using a 3D printer requires careful planning and attention to detail. You need to choose the right printer for your needs, create or download a 3D model, prepare it for printing, and set up your printer correctly. With practice, you can create stunning 3D prints that are limited only by your imagination.